Authenticating Microsoft Account using Microsoft Authentication Library (MSAL)
Overview
Microsoft recently revealed the new Graph APIs at the recent MS Build 2017. These APIs provide a single unified endpoint to access different Microsoft Products, which means you no longer have to deal with different methods of authentication across different platforms. An exciting addition to this is the new and updated Microsoft Authentication Library (MSAL), which is conveniently available across .Net, iOS, Android, and JavaScript. This consolidated library will be used to authenticate both Microsoft personal and Azure AD School and work accounts.
In order to access Microsoft Graph functionality, the first step is to authenticate and get the access token using MSAL, which will be discuss in this tutorial.
Pre-Requisites
Install Microsoft.Identity.Client Package
Make sure you have added the Microsoft.Identity.Client Nuget Package to your project.
To add the pacakge Go to Tools > Nuget Package Manager > Package Manager Console
Install-Package Microsoft.Identity.Client -Pre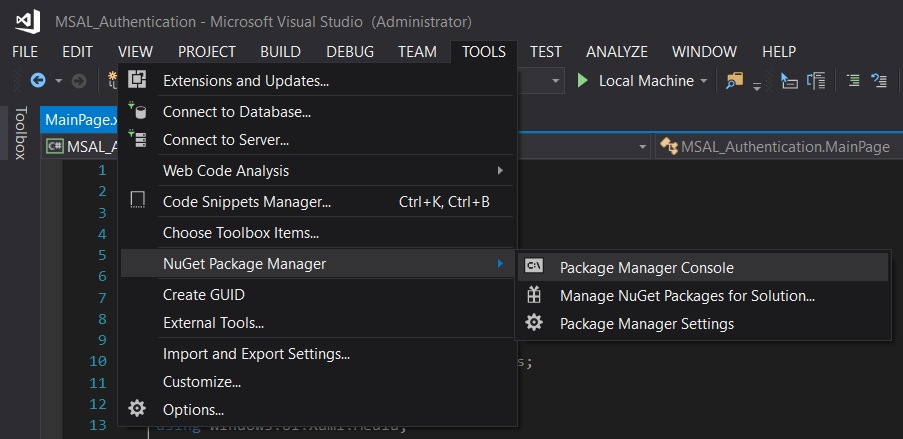
Register your application to get Client Id
Make sure you register your application at the Microsoft Application Registration Portal and make a note of the Client id / Application Id. This Client Id will be required later when authenticating the user account.
https://apps.dev.microsoft.com/portal/register-app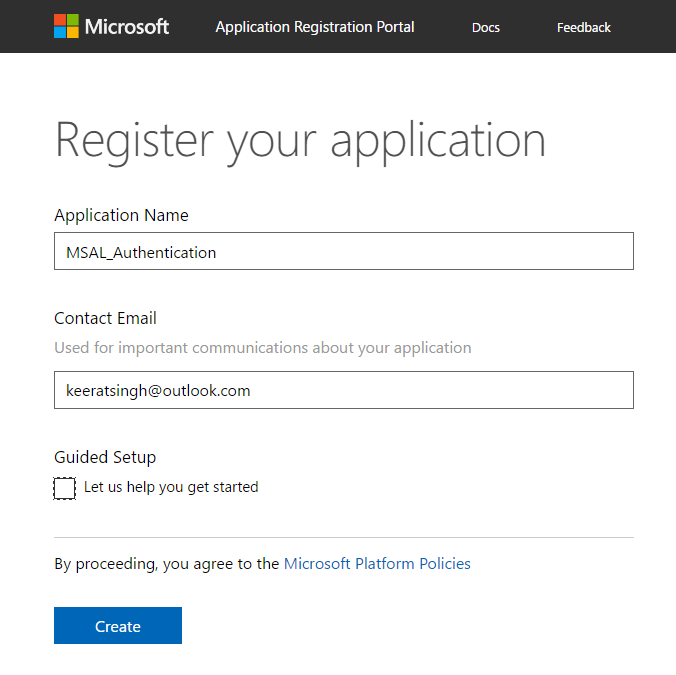
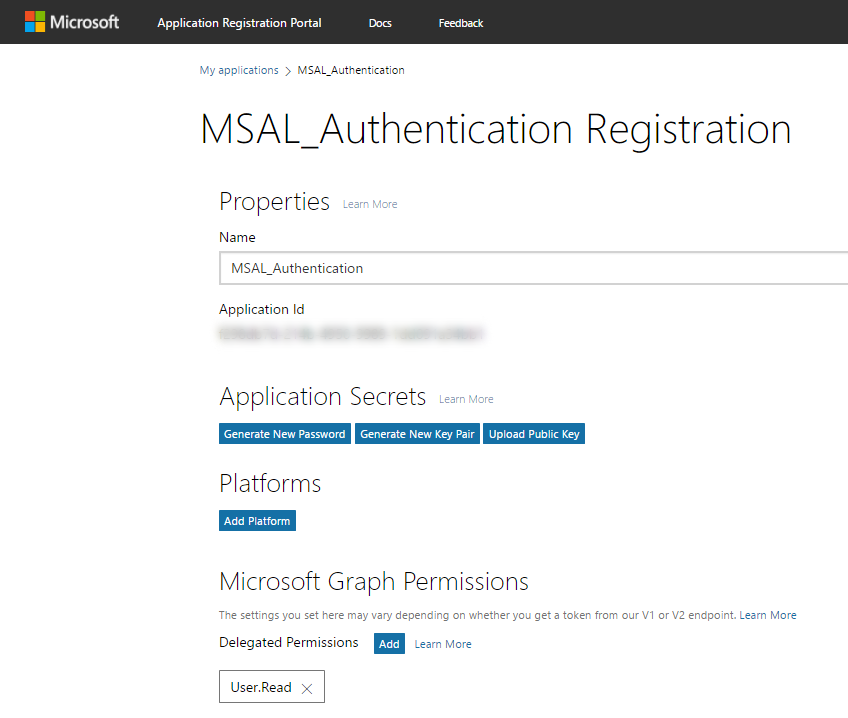
1. Request Token
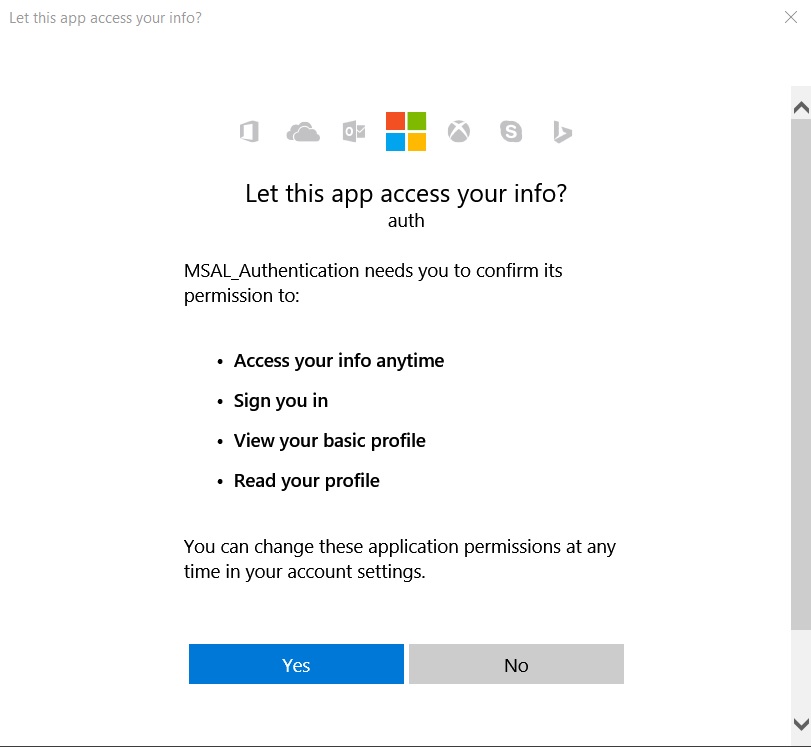
The very first step is to request a token. Once authenticated, the requesting application receives a token, which further can be used to query Microsoft Graph API. This token is used to access certain resources, such as user’s information, send emails, read OneNote notebooks and many other protected resources. We use the AcquireTokenAsync method to acquire the token interactively, as it displays the user sign-in window as seen below.
    //Set the scope
    private string[] _Scopes = new string[] { "User.Read" };
    public static PublicClientApplication clientApplication = new PublicClientApplication(_ClientID);
    authResult = await App.clientApplication.AcquireTokenAsync(_Scopes);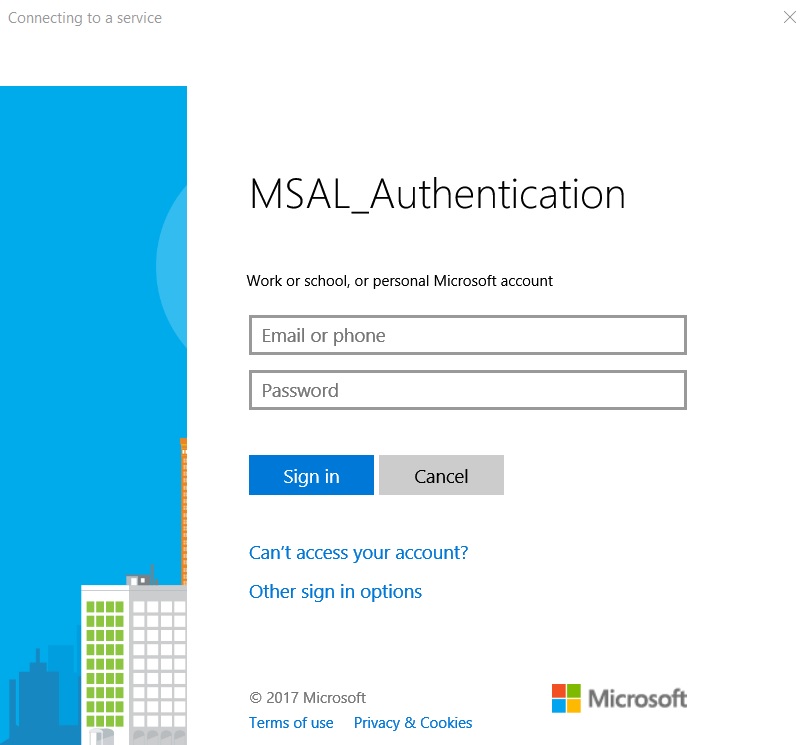
2. Receive and Parse Token
AcquireTokenAsync method returns an object of class AuthenticationResult, which is stored in the variable authResult.
The actual token is stored in the authResult.AccessToken property.
We check if the object returned by the function call AcquireTokenAsync is not null and then parse the object and display it accordingly.
if (authResult != null)
{
    DisplayParseAuthResult(authResult);
    string response = await SendGetRequest(authResult.AccessToken);
    DisplayAPIResponse(response);
}
3. Send GET Request with token
Once the token is received, we send a GET request attaching the access token as a header using the HttpClient class.
The GET request is sent to the https://graph.microsoft.com/v1.0/me Graph API Endpoint.
//Set the API Endpoint
string _GraphAPIEndpoint = "https://graph.microsoft.com/v1.0/me";

HttpClient httpClient = new HttpClient();
httpClient.DefaultRequestHeaders.Add("Authorization", "Bearer " + _AccessToken);
Uri GraphAPIEndpointUri = new Uri(_GraphAPIEndpoint);
4. Display Graph API Response
The response from the Graph API call is returned in the form of HttpResponseMessage object. We then serialize the HTTP content to a string using the ReadAsStringAsync method. This string is then displayed on the UI.
HttpResponseMessage response = await httpClient.GetAsync(GraphAPIEndpointUri);
var content = await response.Content.ReadAsStringAsync();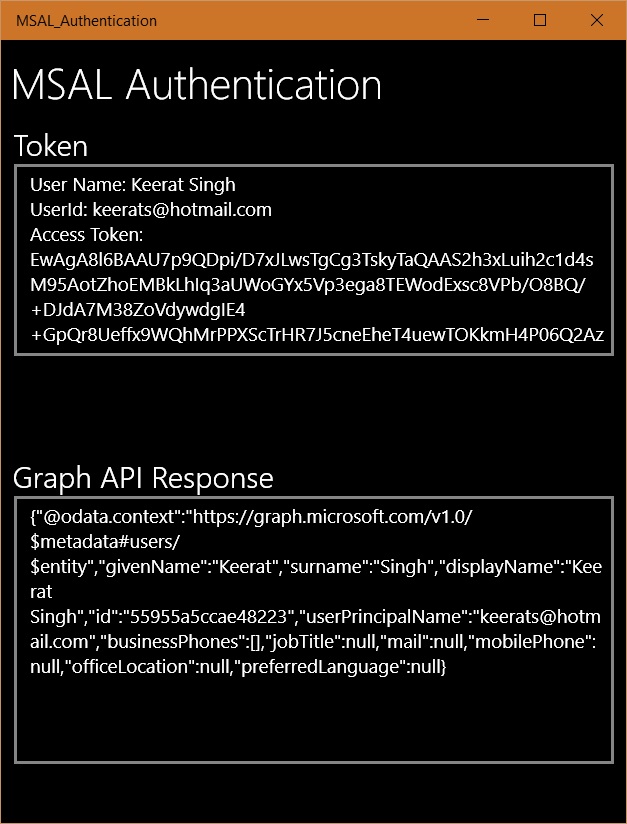
Source Code
You can find the source code at Github MSALAuthentication repo along with the Visual Studio 2017 solution.
Final note
This is a very brief introduction to get you started using the MSAL and calling the Graph API. You can use the token received for further calls to the Graph API, as long as the token is in the header of the GET request. If you have any questions or concerns, feel free to leave a comment.